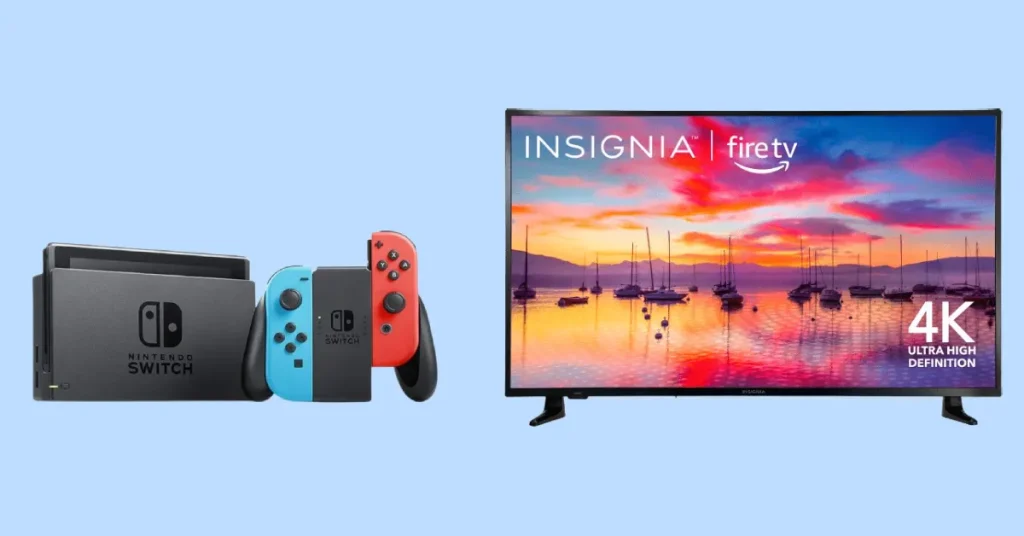
If you want to connect your Nintendo Switch to an Insignia Fire TV, you’re in for a much better gaming experience. You’ll get clearer visuals, more immersive gameplay, and an overall smoother experience by hooking up your Switch to a bigger, high-definition screen. Whether you’re playing solo or having a multiplayer session, the larger screen of the Insignia Fire TV makes everything more enjoyable. Plus, transitioning from handheld mode to TV play is quick and easy, giving you the best of both worlds!
By utilizing the Switch’s dock and an HDMI connection, you seamlessly transition from portable gaming to a full-fledged console experience, bringing multiplayer mayhem or solo adventures to the big screen. The result? A more comfortable, engaging, and friendly gaming setup that makes the most of both the Switch’s flexibility and Insignia Fire TV’s capabilities.
What You’ll Need
- HDMI cable
- Nintendo Switch Dock
- Insignia Fire TV remote (for input switching)
- Power source for both devices
Using HDMI to Connect Nintendo Switch to Insignia Fire TV
The easiest and most reliable way to connect your Nintendo Switch to an Insignia Fire TV is through an HDMI cable. Here’s how to do it:
Step 1: Set up the Nintendo Switch dock
First, make sure your Nintendo Switch dock is ready to go. Here’s what you need to do:
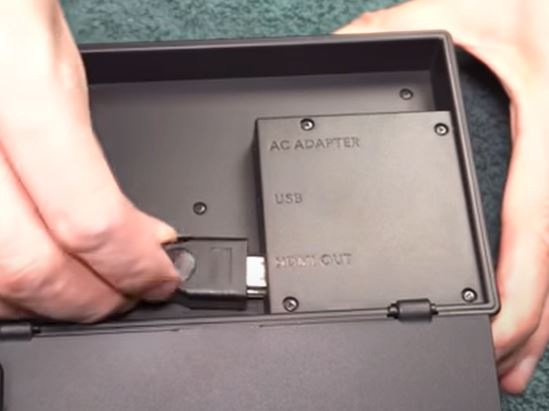
- Open the back cover of the dock.
- Plug the AC adapter into the top terminal labeled “AC ADAPTER” on the dock.
- Connect the other end of the AC adapter to a wall outlet.
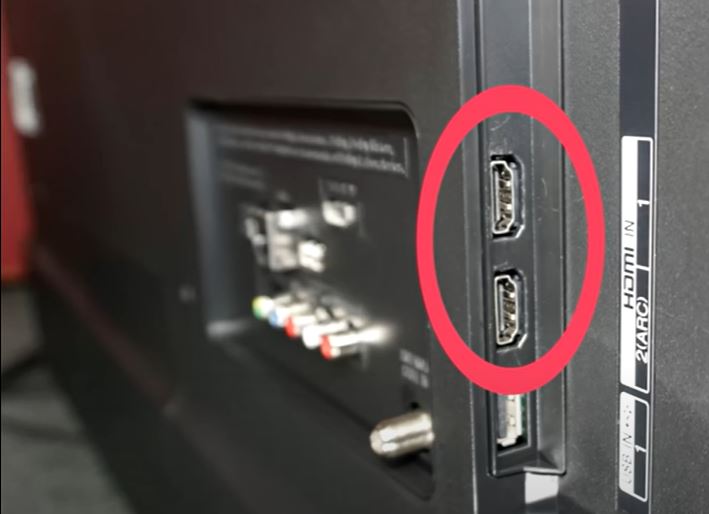
- Plug one end of the HDMI cable into the bottom terminal labeled “HDMI OUT” on the dock and the other end in the “HMDI IN” port of your Insignia TV.
- Close the back cover of the dock.
Step 2: Insert your Nintendo Switch into the dock
Now, it’s time to put your Switch console into the dock. Here’s how:
- Remove the Joy-Con controllers from your Switch if they’re attached.
- Position your Switch so the screen is facing the same direction as the front panel of the dock.
- Gently insert your Switch into the dock.
Step 3: Turn on your Insignia Fire TV
Next, let’s get your Insignia Fire TV ready:
- Turn on your Insignia Fire TV.
- Press the “Home” button on your Fire TV remote to go to the home screen.
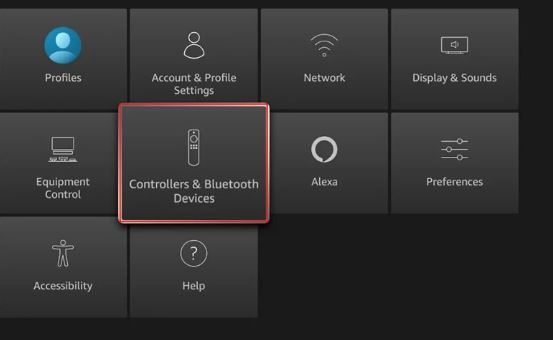
- Go to “Settings” by clicking on the gear icon.
- Select “Controllers & Bluetooth Devices.”
- Choose “Game Controllers.”
- Select “Add New Game Controller.”
Step 4: Connect the Nintendo Switch Pro Controller
Now, let’s connect your Nintendo Switch Pro Controller to your Insignia Fire TV:
- Press and hold the “Sync” button on your Pro Controller until the lights turn on.
- Your Pro Controller should appear on the screen. Select it to connect.
- Once connected, you can use your Pro Controller to navigate your Insignia Fire TV and play games!
Step 4: Adjust your settings
Finally, let’s make sure everything looks great on your Insignia Fire TV:
- Go to “Settings” on your Nintendo Switch.
- Select “TV Settings.”
- Adjust the resolution, screen size, and other options to your liking.
And that’s it! You should now be able to enjoy your Nintendo Switch games on your Insignia Fire TV. Have fun gaming!
Can You Connect the Nintendo Switch to Insignia TV Wirelessly?
Unfortunately, the Nintendo Switch doesn’t support wireless connections for displaying games on a TV. It must be docked and connected via HDMI to output video to any TV, including the Insignia Fire TV. However, you can connect your Joy-Cons or Pro Controller wirelessly to the Switch, giving you the freedom to sit back and play from a distance while still using the TV screen.
Troubleshooting Connection Issues
If the TV doesn’t show your Switch screen after following the steps above:
- Double-check that the HDMI cable is fully plugged into both the Switch dock and the TV.
- Make sure your Switch is turned on and properly seated in the dock.
- Try restarting both your TV and the Switch.
If the image is slow or flickering, try a different HDMI cable or test the current cable on another device.

Kevin is a seasoned Consumer Electronics Expert with over two decades of experience in reviewing and testing a wide range of devices, including televisions, home theater systems, and smart gadgets. His deep understanding of display technologies like OLED, QLED, and 4K UHD sets him apart, helping consumers make informed decisions. Kevin’s background in electronics engineering, paired with his passion for emerging tech trends, makes him a trusted voice in the industry.
